This cranberry sauce recipe is sweet, tart and bursting with fresh orange flavor! Made with whole cranberries, orange juice, brown sugar and warm spices, it comes together in just 15 minutes of prep and cooking. It’s an easy, homemade Thanksgiving side dish that you can make ahead of time, so there’s one less thing to worry about on the big day!
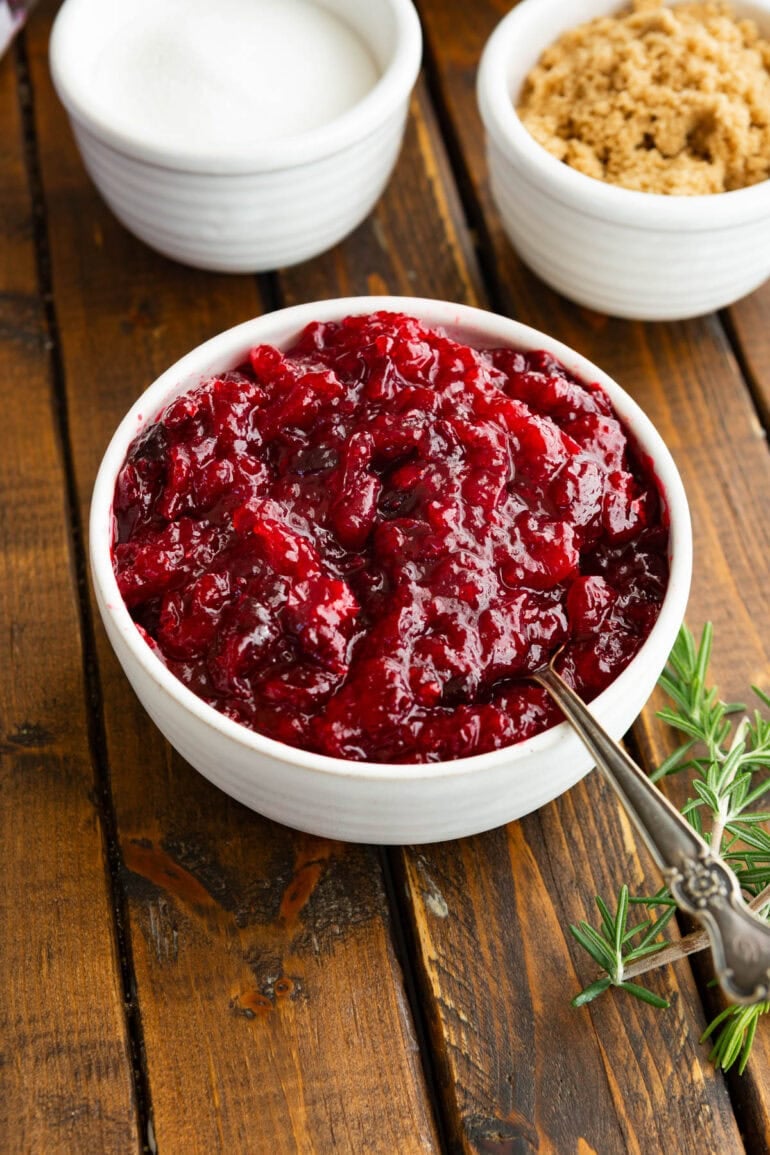
I grew up thinking I didn’t like cranberry sauce. My dad loved the canned stuff, and every Thanksgiving my mom would open a can just for him. The rest of us? No thank you!
Then one day, I had a leftover turkey sandwich at a little sandwich shop, and everything changed. That sweet and tart cranberry sauce with the turkey?! I finally understood what I’d been missing!
Now, homemade cranberry sauce is a must-have at our Thanksgiving table. And trust me, once you try it with fresh orange juice and a little brown sugar, you might never go back to the canned stuff!
Why You’ll Love This Cranberry Sauce Recipe
- The perfect balance of sweet and tart: White sugar sweetens the cranberries while brown sugar adds a little richness that makes the sauce extra delicious.
- Fresh orange flavor: The orange juice brings out the natural fruitiness of the cranberries without overpowering them.
- A hint of holiday spice: Just a little cinnamon and cloves give this cranberry sauce a flavor that’s anything but boring!
- Everything cooks in one saucepan: No complicated steps or special equipment. Just simmer the ingredients together and let the cranberries work their magic!
Ingredients You’ll Need
You only need 7 simple ingredients to make this homemade cranberry sauce! The combination of fresh orange juice and warm spices makes it extra special.
Read more
This easy pie crust recipe is flaky, tender and made from scratch with simple ingredients, including shortening, egg and vinegar. There’s no chilling required, so you can roll it out right away and no pie weights required for blind baking!!
This recipe has been passed down from my grandma to my mom and now to me, and it’s one of those family recipes I hope my girls will pass down someday, too! We call it Mom’s Fail-Proof Magic Pie Crust, and once you learn a few simple tricks, you’ll see that making homemade pie crust really isn’t as intimidating as it seems!
QUICK LOOK
- Prep Time: Approximately 15 minutes
- Chill Time: None required!
- Yield: 2 single pie crusts or 1 double-crust pie
- Skill Level: Beginner-friendly
- Make Ahead: Freeze the extra dough for up to 3 months
Why You’ll Love This Easy Pie Crust Recipe
- Flaky and tender: Shortening creates a deliciously tender crust that’s perfect for all your favorite pies.
- No chilling required: Mix, roll and shape your dough without waiting for it to rest!
- Simple ingredients: Grandma’s secret additions of egg and vinegar make this old-fashioned recipe extra special.
- Makes two crusts: Use both for a double-crust pie or freeze one for later!
Ingredients You’ll Need
You only need a few simple ingredients to make Grandma’s homemade pie crust!
- All-Purpose Flour: Gives the crust structure while keeping it tender.
- Salt: Enhances the flavor of the crust.
- Shortening: The secret to a tender, flaky pie crust! Make sure it’s chilled before using. I highly recommend using butter flavored if you have it for even more flavor!
- Egg: Helps bind the dough together and contributes to its texture.
- Vinegar: Grandma’s special addition! Adds acidity to the dough without making the crust taste like vinegar.
- Ice Water: Keeps the shortening cold while bringing the dough together.
PRO TIP: Use cold shortening and ice water! Keeping the fat cold helps create a flaky crust instead of a dense, tough one.
How to Make Homemade Pie Crust
You don’t need any
With only 3 Ingredients I’ll show you how to make the VIRAL sugared cranberries recipe! Fresh cranberries, water, & sugar are a festive way to make your holiday cheese platters, drinks, and desserts look like a winter wonderland!
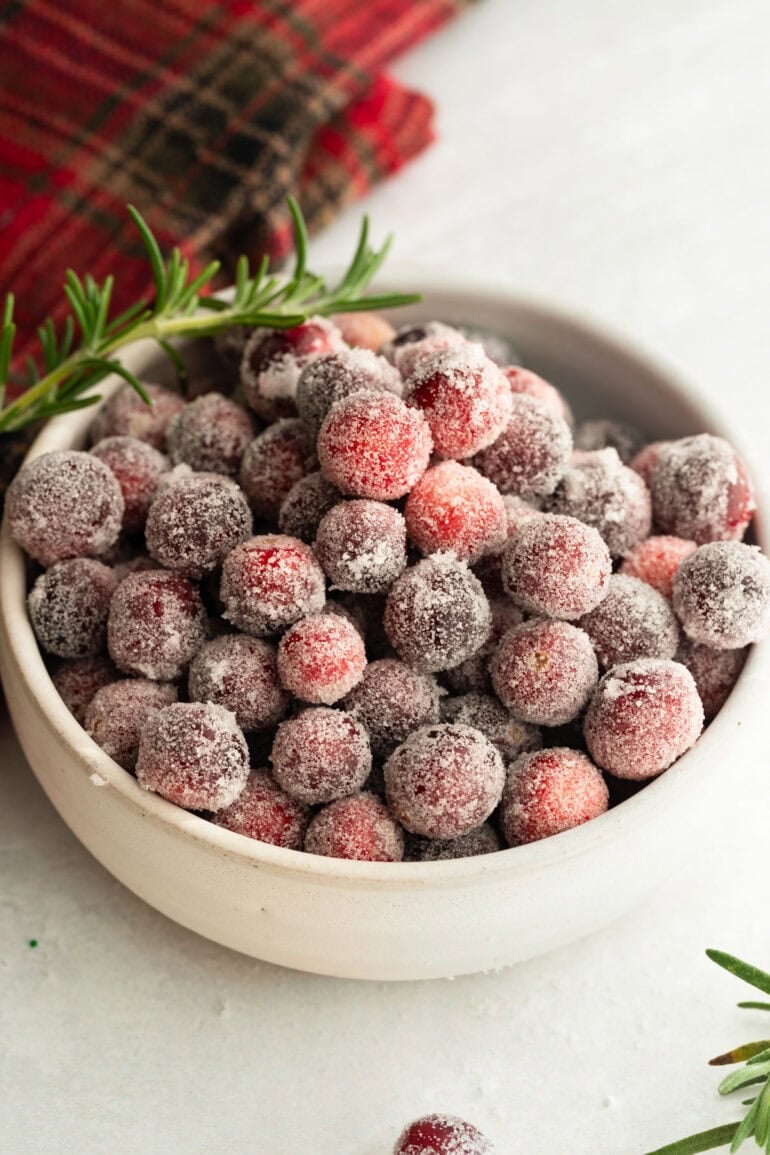
You guys, I am OBSESSED with how pretty these little cranberries are! Our viral candied cranberries go crazy every Christmas, so I decided to try a sparkling sugared version. And OH MY GOODNESS, they’re gorgeous!
Just coat fresh cranberries in a simple sugar syrup, let them dry and roll them in sugar. That’s it! That sweet, crunchy coating with the tart pop of cranberry is such a fun combination!
Why You’ll Love These Sugared Cranberries
- Absolutely Gorgeous: That sparkling, frosted coating makes even the simplest holiday treats look extra special!
- The Perfect Sweet-Tart Bite: The crunchy sugar coating balances the natural tartness of fresh cranberries.
- So Versatile: Dress up everything from Christmas cakes to holiday cocktails with these beautiful little berries.
- Fun for the Kids: Rolling the cranberries in sugar is an easy job for little helpers!
These Korean ground beef broth ramen bowls are loaded with crispy, caramelized beef, tender ramen noodles and a rich, creamy coconut gochujang broth! The noodles cook right in the broth, soaking up all that sweet, savory and spicy flavor without needing another pot.
You guys, you know how much we LOVE our Korean Ground Beef Recipe! Well, we’ve taken those same sweet and savory flavors and turned them into the most incredible ramen bowls based off our VIRAL Beef Broth Bowls!
And here’s the game changer: cooking the ramen noodles directly in the broth! Every bite soaks up all that creamy, spicy flavor, and when you add the crispy beef and a squeeze of fresh lime?! HEAVEN!!
Plus, everything cooks in the same skillet, so there’s hardly any cleanup!
Why You’ll Love These Korean Ground Beef Ramen Bowls
- The crispy beef is irresistible! Browning the beef before breaking it apart creates those delicious caramelized edges that make every bite even better.
- The broth is something special! Creamy coconut milk balances the heat from the gochujang while lime adds just the right amount of brightness.
- The textures are incredible! Tender noodles, crispy beef and crunchy scallions make every bite a little different.
- Make it your own! Add more heat, pile on your favorite vegetables or customize the toppings for everyone at the table.
- Better than basic instant ramen! A few simple ingredients turn inexpensive ramen noodles into a seriously delicious dinner.
Ingredients You’ll Need
For the Crispy Korean Ground Beef
- Canola Oil: Helps the ground beef develop those crispy, browned edges.
- Ground Beef: Ground chuck is a great choice for rich flavor and delicious caramelization.
- Garlic: Adds savory depth to the beef.
- Soy Sauce: Brings that salty, umami flavor that makes Korean-inspired beef so delicious.
- Orange Juice: Adds a little sweetness and bright citrus flavor.
- Brown Sugar: Helps create the sticky, caramelized coating on the beef.
- Sweet Chili Sauce: Adds sweetness with a little gentle heat.
- Toasted Sesame Oil: Gives the beef a rich, nutty finish.
- Cornstarch: Helps thicken the sauce so it clings to the beef.
This Cheesecloth Turkey recipe is our tried-and-true secret for a golden, juicy turkey with the most flavorful herb butter crust. This method makes a beautifully golden skin and turns out the juiciest roasted turkey recipe you’ve ever had!
If roasting a whole turkey makes you nervous, the cheesecloth method is one of the easiest ways to get a juicy, flavorful bird with beautifully browned skin and no expert skills. The turkey is wrapped in butter-soaked cheesecloth as it roasts, which helps baste the meat and protect the skin while it cooks.
Here’s What I’ll Teach You for the Perfectly Golden Thanksgiving Turkey
I’ll show you exactly how to use cheesecloth, when to remove it, how to know when the turkey is done, and how to get that golden skin without drying out the meat.
Why You’ll Love This Turkey Recipe
- Incredibly juicy turkey every time
- Golden, flavorful skin
- Easy herb butter method
- Helps prevent dry turkey
- Perfect Thanksgiving centerpiece
- Simple ingredients
- Makes amazing leftovers
- A tried-and-true holiday recipe
- Less stressful than traditional turkey methods
Everything you Need to Know About Cheesecloth
Why Use Cheesecloth on a Turkey?
The butter-soaked cloth acts almost like a blanket over the turkey. It helps keep the surface from drying too quickly while the butter and pan juices continually coat the skin.The butter-soaked cloth acts almost like a blanket over the turkey. It helps keep the surface from drying too quickly while the butter and pan juices continually coat the skin.
How to Use Cheesecloth on a Turkey
1. Cut the cheesecloth to size
Use a piece roughly 3½ feet by 1½ feet and fold it in half.
2. Soak it completely
Explain that every part of the cloth needs to be saturated.
3. Drape it over the turkey
Gently draping the cheesecloth over the bird and smoothing it out will help it to brown evenly. Mine slipped in the photos precisely because I hurried and did not smooth.
4. Remove it at the right time
This is huge. Do not pull the cheesecloth until directed!
5. Finish uncovered
T