Arroz con Leche

Web Admin 0 122 Article rating: No rating

Arroz con Leche is a Mexican rice pudding made with sweetened condensed milk, evaporated milk, whole milk, and plenty of cinnamon.

This heartwarming dish offers a taste of tradition and comfort to anyone lucky enough to taste its creamy goodness. Arroz con Leche is a crowd-pleaser every time we make it.

rice pudding in clear glass with cinnamon stick

What is Arroz con Leche?

Arroz con leche, which translates to “rice with milk” in English, is a sweet rice pudding enjoyed across Spanish-speaking regions worldwide.

This is a Mexican rice pudding recipe made with sweetened condensed milk, evaporated milk, whole milk, and plenty of cinnamon.

While the ingredient list is about as basic as a dessert recipe can get, the result is a rich, creamy, flavorful dessert that we absolutely love.

small gold spoon with a bite of rice pudding

Arroz con Leche

As soon as I opened my friend Krysten’s cookbook and spied her recipe for Arroz con Leche, I knew that recipe needed to be made as soon as possible. Luckily, with a handful of ingredients I already had on hand, I was stirring this together in less than an hour.

There are so many awesome, easy-to-make recipes in this cookbook, it really is named appropriately: So Easy & So Yummy!

so easy, so yummy cookbook with dish of rice pudding on topRead more

Rocky Road Fudge

Web Admin 0 140 Article rating: No rating

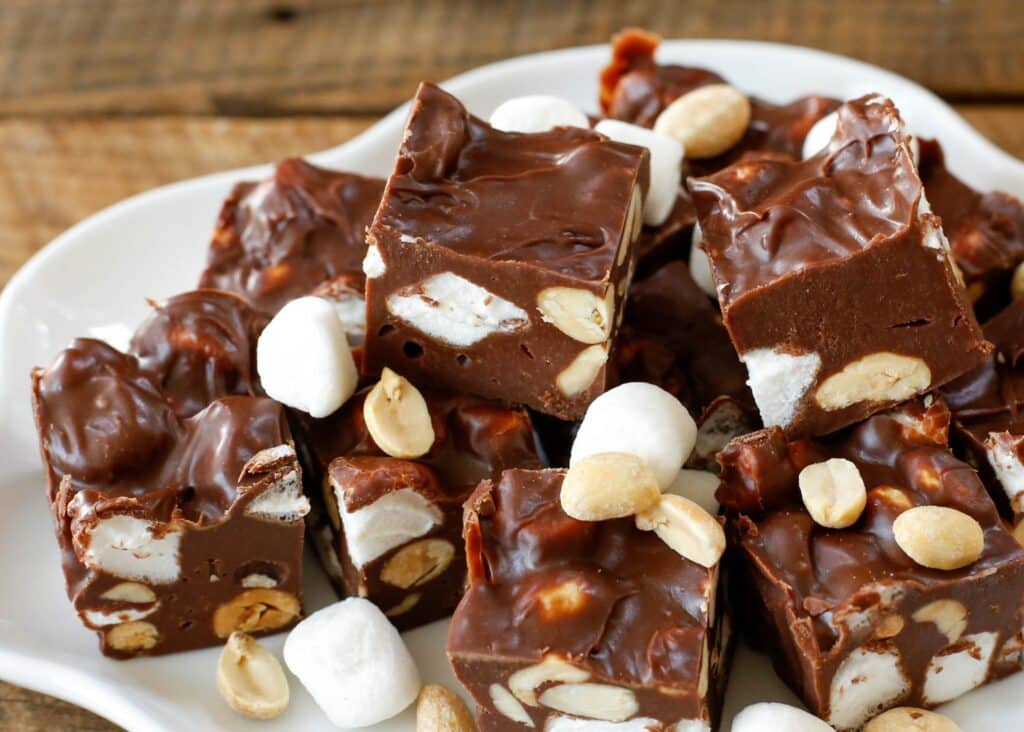
Creamy chocolate fudge filled with peanuts and marshmallows makes a chewy, crunchy, salty, sweet Rocky Road Fudge that all ages will enjoy.

Rocky Road ice cream has been one of my favorite ice cream flavors ever since I was a child and this Rocky Road Fudge has everything I love about the classic ice cream flavor mixed into a rich chocolate fudge.

Rocky Road Fudge - get the recipe at barefeetinthekitchen.com

Rocky Road brownies, Rocky Road chocolate bark, Rocky Road pretty much anything is sure to be a hit with my family. What’s not to love about a handful of chocolate filled with peanuts and marshmallows?

Rocky Road Fudge

When I was playing with ideas for new fudge recipes this holiday season, I knew I needed to make a rocky road fudge. I’ve put peanuts in fudge before, and I’ve put marshmallows in fudge, but I had yet to try both together.

I’m happy to report that the finished Rocky Road Fudge was just as good as I imagined it would be, if not better. It was a hit with my kids and given the opportunity we could have polished off the whole batch in no time at all.

5 Minute Fudge

I am so completely hooked on five-minute fudge recipes. Unlike traditional old-fashioned fudge recipes, no candy thermometers or other special equipment is required.

You don’t even need a stove to make this fudge. Everything melts in the microwave and then sets up in the fridge in just a few hours.

My 5 minute fudge obsession started with this simple Chocolate Pecan Fudge, a recipe I’ve used as the base for tons of chocolate fudge recipes since, including this one.

Rocky Road Fudge is the latest incarnation of 5 minute fudge I’m sharing this year. Don’t miss the others like White Chocolate Pretzel Fudge, bite size pieces of salty-sweet heaven. Creamy Peanut Butter Fudge, Chocolate Covered Oreo Fudge, and Peppermint Marshmallow Fudge are even more recipes you’re sure to enjoy.

I also plan to give this Eggnog Fudge and this Read more

Foil Baked Mustard Maple Bacon Salmon

Web Admin 0 201 Article rating: No rating

Foil Baked Mustard Maple Bacon Salmon

Tender flaky salmon wrapped in bacon and glazed with a garlic maple mustard sauce, this baked salmon recipe is sensational! You have to try it!

My friend Megan swears by her dad’s salmon and bacon. I only like salmon when it’s got enough flavor to mask the fact that it’s actually fish. Bacon to the rescue! Everything is better with bacon!

My friend Janet makes a good one, and I love a few of our own recipes like our Salmon Bowls and Asian Sticky Salmon, but when Megan said there was bacon in her dad’s recipe, I was so intrigued!

If you have been an OSB follower for long, you will know that I am not a seafood person. It’s just not my thing. Even salmon…I have been trying to love salmon for years, and I have to say that this baked maple mustard salmon has won me over!

Recommended Equipment

Before You Begin…

Grab four sheets of foil that are big enough to wrap each of your fillets in and lay 2 slices of bacon vertically on each piece of foil.

How to Pick Good Fresh Salmon

Buying salmon at the grocery store can be intimidating, but it doesn’t need to be! There are a few things to look for…

  • Smell – good fresh salmon should not have a fishy smell
  • Color – vibrant, deep shades of red/coral/pink is what you are after and there shouldn’t be any brown spots anywhere on the fillet
  • Appearance – it should look moist and not dried out
  • Touch – when you gently press the salmon, it should bounce back and not leave an indentation

What Do I Need to Make This Baked Salmon Recipe?

All the ingredients are easy to find and create the most amazing flavor. Here is what you will need:

  • Salmon Fillets
  • Lemon
  • Kosher Salt
  • Pepper
  • Olive Oil Mayonnaise
  • Maple Syrup: Grade A
  • Garlic
  • Dijon Mustard
  • Yellow Onion
  • Bacon
  • Thyme: or parsley

The measurements for each ingredient can be found in the recipe card. You can also print and save the recipe there.

How to Make Baked Maple Salmon

  1. Prep: Preheat the oven, get foil pieces ready and place the bacon on each piece of foil. Season the salmon fillets.
  2. Sauce: Whisk all the ingredients of the sauce together and pour the sauce on each fillet.
  3. Assemble: Top the fillets with the onions and wrap the bacon around the fillets. Fold the foil around each piece of salmon.
  4. Bake: Place the sheet pan in the oven and bake, then open the foil and change the oven to broil to crisp up the top for about a minute.
  5. Season: Sprinkle each fillet with fresh herbs and serve!

The complete instructions for making this recipe can be found in the recipe card at the end of the post. Keep scrolling for all the details.

Read more

Maple Banana Nut Oatmeal

Web Admin 0 228 Article rating: No rating

Creamy, chewy oats, bananas, and pecans are topped with a generous drizzle of maple syrup to make this warm and filling Banana Nut Oatmeal. Less than 10 minutes of effort is required to put this hot breakfast on the table.

Overhead close-up wide shot of maple banana nut oatmeal, served with a silver spoon in a white bowl with blue floral print

Oatmeal with Bananas

I love making oatmeal for breakfast. The fillings and toppings are endless and the different variations keep it interesting.

Different variations of banana oatmeal tend to be my go-to addition to stovetop oatmeal recipes. We pretty much always have a basket of bananas on the counter and everyone enjoys them.

My two youngest boys are always happiest with a bowl of oatmeal first thing in the morning.

Maple Oatmeal

While you can sweeten oatmeal in any number of different ways, I’ve found that a small amount of maple syrup provides a lot of flavor and sweetness.

Depending on the oatmeal add-ins, some fruits will provide all the sweetness I want, but when the oatmeal needs just a little something more, I reach for the maple syrup.

When I have it on hand a dollop of whipped cream is a big treat for the kids and it gives the illusion of eating dessert for breakfast. (That is a win with everyone!)

Overhead shot of maple banana nut oatmeal, served with a silver spoon in a white bowl with blue floral print

Sautéed Green Beans and Cherry Tomatoes

Web Admin 0 451 Article rating: No rating

Sautéed Green Beans and Cherry Tomatoes

a photo of sauteed fresh green beans mixed with cherry tomatoes and sprinkled with feta cheese with two lemon wedges on the side.

Harvest the last of your green beans and cherry tomatoes and make this quick and simple side dish that is both healthy and appetizing!

I literally make this dish every month all year long. Snapping beans and the “thunk” of each pod hitting the bottom of a large, white bucket is burned into my childhood memory . We’d busily snap beans for my mom to can during the summer in Washington and then enjoy them all year long.

Nowadays I’ve leaned away from canning a bit and instead savor those summery flavors every month but keeping two basic ingredients in hand, just cherry tomatoes and green beans. So simple and budget friendly!

Recommended Equipment

Before You Begin…

You’ll want to get started by washing and trimming your green beans and giving them a quick blanch. See section below for how to blanch green beans.

What Do I Need for Sautéed Green Beans and Tomatoes?

You only need a few simple ingredients to make this tasty vegetable side dish.

  • Green Beans: fresh is best, either from the garden or grocery store
  • Kosher Salt: adds flavor to the water that you boil the green beans in
  • Water: used to boil the green beans
  • Olive Oil: helps sauté the shallots and vegetables
  • Shallot: adds a mild onion flavor
  • Garlic: adds flavor
  • Cherry Tomatoes: different varieties are best, grape tomatoes also work great
  • Salt and Pepper: adds flavor
  • Lemon: adds a bright citrusy flavor
  • Fresh Herbs: You can use any combination you want. We like to use herbs such as thyme, parsley, dill or oregano.
  • Feta: or cotija works too…and the cheese is totally optional

The measurements for each ingredient can be found in the recipe card at the end of the post.

How to Blanch Green Beans So They Actually Stay Crisp

Blanching is the process of cooking a fruit or vegetable by quickly scalding them in boiling water then moving them to an ice bath to stop the cooking process. For this recipe, you will only leave the green beans in the boiling water for 2-3 minutes. This is just enough time to cook the green beans until tender but still crisp.

If you let them go much longer, they will start to get soggy and lose their bright green color. By transferring the cooked green beans to a bowl of ice water, they stop cooking and stay crisp for the next step of the recipe.

Do You Have to Trim Green Beans?

You should remove the top end of the green bean. This is the end that was once connected to the plant. It can be quite hard and chewy, so you wouldn’t want to eat it. Some people like to also remove t

RSS
First4546474850525354Last